HomeClassesPrintsDVD's

Saturday, November 17, 2012

More pictures of the backyard and patio

 We have a lovely minneola citrus tree. The fruit is just now starting to ripen. I have planted impatiens in front and to the side of the boy and girl statues. 


We brought our two espallier apple trees from the other house at the wrong time of the year to transplant but they made it thank goodness. Different color petunas are planted all across the back.


Another picture of our fountain..to the left of the fountain on the back wall I have started training red bougainvillea in an espallier shape 
 
 
I guess you realize by now that I really love the backyard and working with flowers. Hubby and I spend a lot of time drinking coffee and reading out there. Here are more pictures...hope you enjoy.

Tuesday, November 13, 2012

back yard and patio

Thought you would like to see our backyard and patio..we have a lot of work to do to get it the way we want it.. it just takes time. Jack has planted a  very small vegetable garden..tomatoes, onions and burp less cucumbers. I have edged the front with nasturtiums. Not only are they pretty but are great in salads as well as cut flowers

Welcome
 

As you come in the gate to the right is our front door. Across from it is our girl we brought with us from the other house. I planted the two large urns with decorative Kale.  The large spikes in the back ground are perennials, in the spring they produce white flowers.


another shot of the urn


Picture of the patio with figures brought from the other house..impatience planted along the front and  the side of the brick patio


 The fountain was given to us by our dear friends Bob and Claude Merritt. We have a spotlight we turn on at night that illuminates the ferns and flowers as well as the fountain, When I enter my bedroom that is the first thing I see through the window.Sigh!!!


Saturday, November 10, 2012

making a terrarium

 
This large terrarium is in my office I had the glass piece in the other house full of wine bottle corks.
You need to keep your terrarium out of direct sunlight.This large cylinder jar is on the coffee table in the living room


This little cutie is in my bathroom I have the nest with eggs in it and also some small shells to add interest...that is what is so great about this project you can add figures, bridges,birds, even butterflys.
 
 
Now that we are not having classes, the Decoupage Garage group likes to get together about every two months or so,. we have lunch and work on different projects. The group wanted to see my patio home so I decided on the project for the group, terrariums...I have three different sizes and shapes..One in my office, one in the master bath and one in the living room on the coffee table.Love them and sooooo easy to care for.You need rocks in the bottom for draining then potting soil about 3-4"depending on the size of your terrarium. Different size plants some short others tall add interest. I had bought small birds nests and packages of tiny eggs to share with the gals. Each person brought their own glass container. Denise brought small cactus plants she used in her bowl. Karen had a just right container she had purchased at TJ Maxx some time ago. Donna added plastic mushrooms to her arrangement that just made it.When everyone was satisfied with their terrarium..we added about a half a cup of water and put the lid on. That is all you have to do...with the lid on it waters itself. There are more instructions you can see online.

Friday, October 26, 2012

Went to the doctor yesterday for my annual check up. The first thing they make you do is get on the scales to see how much weight you have gained (won't even let you take off your shoes) guess what... I had gained two pounds...bummer. I have a husband that dearly loves to cook, yes it is really nice to have your own live in chef, but he does get upset if you don't eat all he has fixed, including desert. I do exercise everyday I also need to do the other exercise the one pushing away from the table. Let me know if you have any suggestions for me I really need some. Have a wonderful weekend. Blessings, Vonda

Wednesday, October 24, 2012

More pictures of lamp


One more lamp I brought with me from the other house I want to share with you..bought it on ebay it was painted green. I sprayed it black added gold metal leaf over a red based bole then antiqued with a raw umber glaze. Orange shellac was brushed on the prints to simulate age.Cut out decoupage trims some were glued on others on the shade I did in repousse (stuffed) . It is now in our breakfast room.

Tuesday, October 23, 2012

I AM BACK


WE MOVED..I NEVER THOUGHT I WOULD LEAVE MY OTHER HOUSE. DAUGHTER SAID SHE WANTED US CLOSER TO HER AS WE ARE GETTING OLDER (IT HAPPENS) RIGHT NOW WE ARE JUST 5 MINUTES FROM HER HOME. WE LOVE THE LOCATION CLOSE TO OUR DOCTOR, GROCERY STORE AND MY FAVORITE PLACE TO SHOP HOME DEPOT. ALSO I DID'NT THINK I WOULD EVER FIND A HOME I COULD PLAY WITH LIKE THE OTHER BUT I HAVE...JUST LOVE IT. I WILL BE SHARING PICTURES WITH YOU WHAT WE HAVE DONE TO THIS PLACE.

REFURBISHED LAMPS FOR THE HOUSE

 DONNA HIGBY FOUND THIS OLD LAMP ON THE CONNER AND BROUGHT IT BACK TO ME AFTER ONE OF OUR CLASSES. I ADDED SILVER AND GOLD PAINT TO BRING OUT THE DETAILS..COVERED A NEW LAMPSHADE WITH FABRIC I HAD AND ADDED THE LOVELY TRIM (DON'T ASK ME WHAT THE TRIM COST BUT IT MADE THE LAMP
 DONNA FOUND THIS ADORABLE LITTLE LAMP AT SOME THRIFT SHOP SHE SOLD IT TO ME..BLESS HER. DECOUPAGE CROWNS WERE GLUED TO THE SHADE AND CRACKLE GLAZE WITH GOLD OIL PAINT RUBBED INTO THE CRACKS ADDED THE FINAL TOUCH. WE HAVE IT IN THE GUEST BATHROOM
 BOUGHT THIS LAMP FOR $14.00 AT THE BOYS AND GIRLS CLUB IN SCOTTSDALE. SPRAYED IT BLACK CUT OUT BLACK AND WHITE PRINTS FOR THE SHADE AND AROUND THE BOTTOM. IT IS ON MY DESK IN THE OFFICE


 I BROUGHT ALL MY THINGS FROM THE MASTER BEDROOM AT THE OTHER HOUSE THEY FIT JUST GREAT. MY TWO LAMP SHADES HAVE INSETS OF FABRIC WITH FRENCH COURT MONKEYS AND ON THE SIDES SILK RED AND YELLOW CHECK FABRIC. THE BASES WERE PAINTED YELLOW BEFORE I ANTIQUED AND DISTRESSED THEM. PLACES HAVE SILVER LEAF I HAVE OXIDIZED


 LAMP I PAID $7.00 AT GOODWILL.IT WAS A HIGH GLOSS BRIGHT BLUE.I SPRAYED IT WITH XIM A FLASH BOND THAT WOULD LET PAINT STAY ON THE SURFACE WITHOUT PEELING OFF. CUT OUT TOILE PRINTS AND BLACK AND WHITE TRIM AND DECOUPAGE THEM TO THE SIDES. SILVER LEAF PAINT WAS ADDED TO THE TOP AND BOTTOM OF THE LAMP. FOUR COATS OF SPRY VARNISH WAS ADDED FOR THE FINISH

Sunday, July 24, 2011

Elizabeth's Studio: Awesome Technique

Elizabeth's Studio: Awesome Technique: "I don't know how many of you are familiar with the women's only Ning artist site www.milliande.ning.com but if you aren't you should go over..."

Thursday, July 14, 2011

Where Bloggers Create blog party!

Welcome to my studio/garage where I create, teach, design, and hang out most of the time. The garage is heated and has air conditioning which is a must here in Scottsdale Arizona. Here are some pictures you might like to see that will give you an idea of what my students have done in class. By the way, every time, when I go online every morning, there are 6-8 hits about classes. Because of this I have started a new concept for people who can not take my classes..It is called DECOUPAGE CLASS IN A BOX. You can order from me or on Etsy. It has all the prints and most of the supplies you will need to finish your project for yourself, or to give as gifts or to sell.


More examples of projects
This little table was done in my 18th century prints. The legs and apron around the top was painted antique white then spattered with orange shellac. Below this set of frames from Hobby Lobby were painted and around the edges faux French ribbon prints were added for interest. 18th century prints were used in the different size frames. A tassle, also from Hobby Lobby, was glued to the bottom.


One of the first projects students do are these faux  French wine tiles. They were put  together with a drawer pull, ribbon and a tassle again from Hobby Lobby. ( Gel Medium was used to adhere the ribbon to the back of the tiles )


Planter with repousse owl, door front done with casein and antiqued and another view of French table

Repousse Country French costume figure in a frame on paper. Faux ribbon around edge of frame

View'd optique or elevations some call this technique. Rose and butterfly in a shadowbox frame.

Why I like to work in my studio/garage because of the built-in cabinets  I can store lots of things.

Now you have an idea what decoupage is all about. If you would ask me questions please blog me and I will be happy to answer them...Vonda

Sunday, May 1, 2011

Lunch and making a necklace

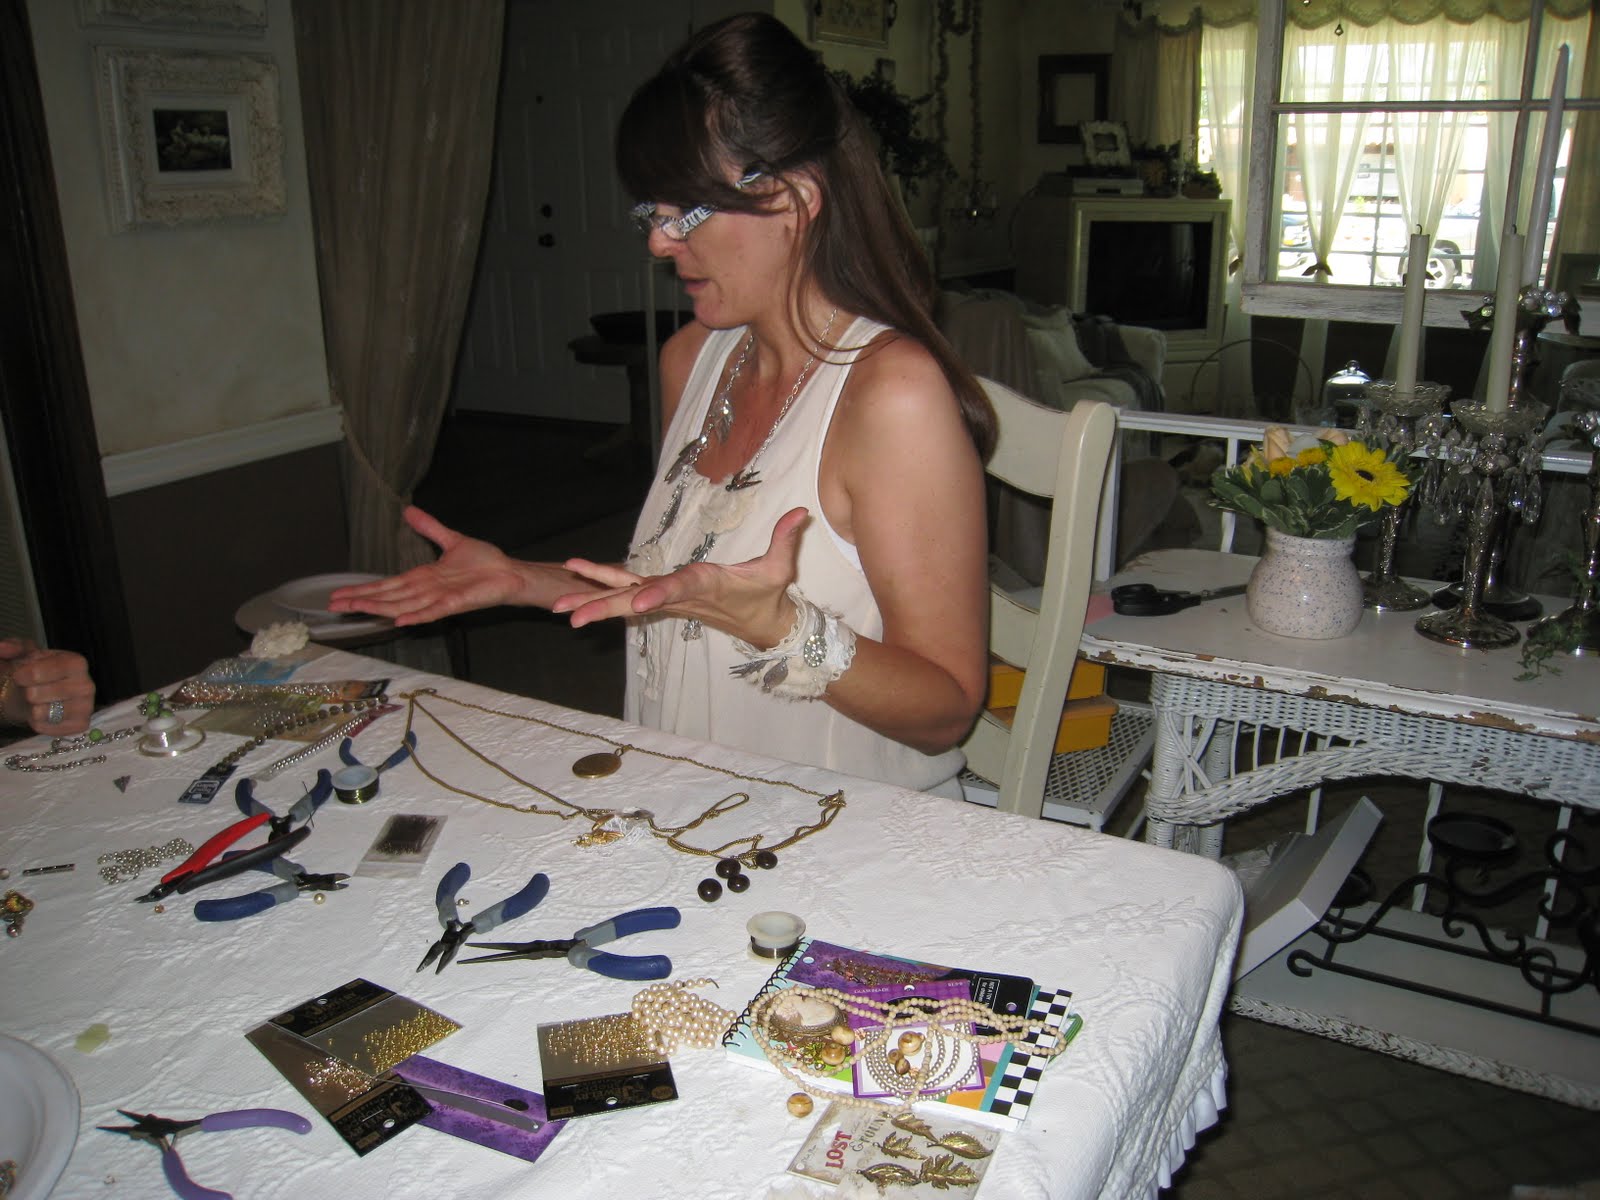
Two weeks ago Karen Valentine, came to our "Decoupage Garage Class" with the best looking necklace she had made. We all went MAD and bit ourselves. She was nice enough to say she would have a luncheon the next Wednesday at her lovely home and show us how to make our own. She gave us a list of supplies
we would need to purchase from the craft store plus we were to bring any old jewelry we might have.


I could not sleep the night before, waiting to see what everybody would come up with. Barbara from the Thursday class had made jewelry before so she joined us also. We sat around Karens dining room table..with jewels, rings, jewelry pliers, wires, beads etc. everywhere. Karen instructed us how to cut several 3 inch  long wires to bring the wire over and around the pliers and twist..then add a bead..then twist again. Everyone was twisting, turning, adding, making, finishing but me. For the life of me I could not get the hang of it. Finally Karen  took pity on me, bless her, and took over my mess and made "a silk purse out of a sow's ear" she is sooooo creative, I owe her big time (she is also making another one for me YEAH!!) Barbara showed us three different kinds of necklace she had made and that set the group off...so the date has been set for next months luncheon at her home to learn how to do her clever necklace pieces . I think I will just go, take my dish for the luncheon and smile alot.

Monday, April 18, 2011

my new etsy shop

Wheeew, I finally did it ...with the help of Karen Valentine setting beside me for hours. She made me take notes (thank heavens) and do it several times. What am I talking about???? my etsy store called Vondas Handmade Things. Today I added three more things all by myself YEAH so for fun go to my etsy store and have a look. She also created my banner..love you Karen. Tomorrow, after class, we set up my Ebay shop.
Stay tuned for some big announcements I am about to make. I am so excited to share them with. In the meantime.

Kiss and Love, Vonda